◀︎ BLOG
How to Experiment with 360˚ Video
Thanks to native support on Facebook and YouTube, virtual reality and immersive 360˚ video have reached a tipping point in which production, distribution, and consumption are now available to almost everyone. There’s one problem, though: Many creators are still struggling to find the best way to tell stories with this medium.
In this post, I'll be sharing a method that I've developed to help IDEO designers prototype immersive media experiences for our clients. But first, let's think about the emerging medium we're designing for.
Tools enable, storytellers enthrall
Early filmmakers in the 20th century had a new tool in the motion picture camera, but had yet to fully explore how to use it to maximum effect. The closest frame of reference for film was theater, so in the silent era, many directors placed the camera “fifth-row center,” and filmed movie scenes as if they were sitting in a theatrical audience—no cuts, close-ups, zooms, or pans.

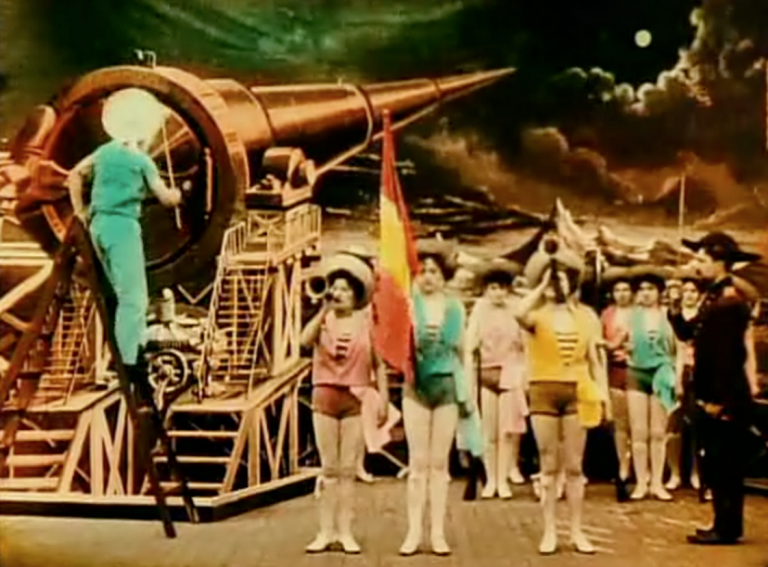
Georges Méliès, "A Trip to the Moon", 1902
Over time, filmmakers experimented with and ultimately developed an established visual language for the new medium. Think of it as the film equivalent of grammar—sentences, paragraphs, and so on.
Early attempts at 360° videos were effectively in the same place as traditional film was 120 years ago. Since the camera can see in all directions—and the user can look in any direction at any time—the classical visual language of film no longer applies. Creators are having to experiment all over again to develop a new visual language that works in this medium.
360˚ video is great for first-person-like views of extreme sports, but it poses a number of challenges for producing narrative content. If the camera can see in all directions, what do we do with the background? How do we direct the viewer's attention?
In response to these challenges, the creators of some first-wave 360˚ videos have chosen to plunk the camera down and orchestrate a performance around it. In other words, if the camera can look everywhere, let’s put the action everywhere.
It’s one way to deal with the format, but I’ve been exploring other ways we might begin to tackle the storytelling challenges of 360˚ video, and also address some of the production hurdles we encounter when we shoot in 360˚.
One of the first instincts creators might have is to buy a 360˚ camera. But that’s a lot of money you really don’t need to spend, and I’d even argue that in some cases, a 360˚ camera may actually limit creative possibilities. Instead, we can repurpose our existing tools.
A partial view of the world
To address this challenge, I’ve created techniques that use traditionally-shot 2D film footage to create composite, immersive 360˚ video worlds. These GIFs showcase a quick overview of the technique, in which four traditional shots are blended into a single 360˚ scene.
So what exactly is happening here?
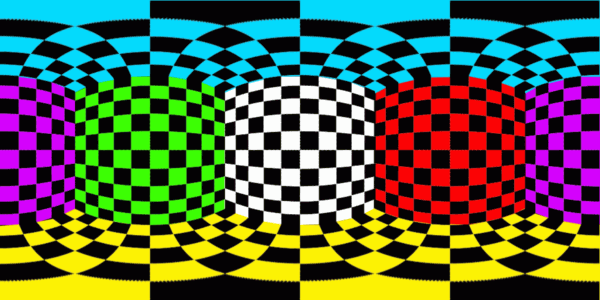
To start, let’s look at what a spherical 360˚ scene looks like when it’s unwrapped.
This is called an equirectangular grid, and it is one of the standards that Facebook and YouTube have aligned around. As you can see, there is significant distortion at the top and bottom of the image. These are the the poles that, when spherized, represent the top and bottom of the view. The centerline, however, remains relatively distortion-free, and luckily for us, that’s the horizon line in all directions.
When wrapped, this distorted grid becomes a clear shape.
Creating your first 360˚ scene
This workflow uses Adobe Premiere Pro, but if you prefer another video editing suite without native VR export, don’t worry, there’s a workaround at the end.
First, let’s get the tech specs out of the way. You’ll want to set up your project and sequence with these settings:
For best results, I recommend editing in a 4K workspace (3840x2160px) at either 30p or 60p.
When compositing 2D shots into the scene, I recommend sticking to the equator of the image as it will have the most predictable results.
Once you have that workspace, import your desired 2D footage. In my example above, I used footage composited on a black background that blends seamlessly into the (also black) background of the 360˚ world, resulting in invisible edges around each of the shots. I was also able to luma-key (effectively a form of green screening) the background so I could overlay several shots to create large scenes composed of multiple individual shots. In my real-world shoots, this technique allowed me to composite multiple individual shots, helping a tiny set to punch well above its weight.
The secret sauce: 360˚ metadata
Now you’ve got your 360˚ scene prepared and are ready to export it for upload. Here’s where the magic happens: To get YouTube or Facebook to see your 360˚ video as such, you must include the proper metadata.
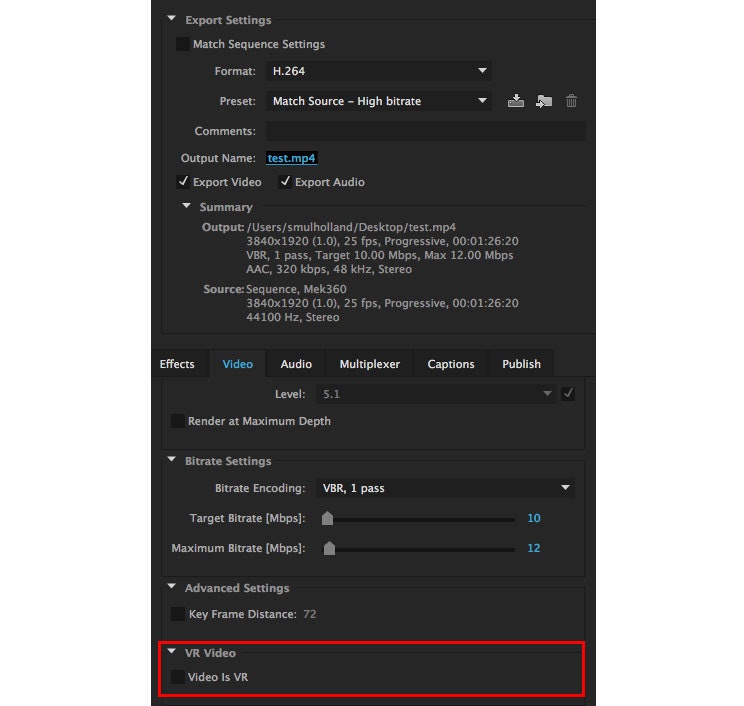
This is much easier than it sounds. If you are using Adobe Premiere Pro CC (2015 or above) this feature is built in. Find it in the export settings at the bottom of the “Video” tab here:
That’s it. Just a simple press of a button, and your video will be recognized as 360˚ content on all the major platforms.
Happy uploading!
This story was originally published on IDEO Labs.


If you do not have native VR export in your video editing software, don’t worry, there is a workaround:
Export your 4K video to H.264 as you normally would.
Inject the required metadata using the YouTube Spatial Media Metadata Injector. This is not as scary as it sounds, and it will enable both YouTube and Facebook to detect your video as 360˚ content.
— First, download the YouTube Injector tool for Mac or Windows.
— Unzip the file, then use the application to open up your video export.
— Select “My video is spherical (360)”.
— Process your file.